![]()
Start Your Own Blog
I’ve been writing blogs for almost 10 years now. I started with just random thoughts and musings and would say I’ve been blogging “seriously” for 6 years now. People often as me if they can sit down with me and talk about blogging so I thought why not write a post! So here it is. Now, there’s a ton of info I could pour into this, but here’s some basics that will definitely get you started.
I totally recommend starting with a self-hosted site using WordPress.org.
Why? There are other free services, but none of them have the control you do with WordPress. You have a full dashboard as well as a library of plug ins to help make your blog “you”. So the first thing you’ll need to do to set up your self-hosted blog on WordPress.org is select your domain name and hosting package.
1) Select your Domain and register it.
A domain is your address. It’s where people go to find your site. You want something that is catchy and fitting. You also want something that is not taken. You don’t want to put in all that time and thought if it’s already owned. You can check out if it’s available here. And if no one owns it you need to register it so it’s yours! If you’re just starting out, I recommend you keep things as simple as possible and take advantage of the free domain name with Bluehost.
2) Decide your Hosting Provider.
Your host is where you park your site. The domain takes your there. You want to pick a provider you trust because if they go down or have issues so do you. You also want someone that will offer support if you do have any issues. There are three hosting services I have used: Bluehost (which we would call a good “beginner” option and the easiest to setup), Turbo Speed Hosting (for larger sites), and Liquid Web (a more expensive advanced option).
Let’s start with the hosting service I currently use, Turbo Speed Hosting. My site has really grown in the past 6 years so I needed lots of space. It’s also super fast! It starts at $15 a month and goes up from there depending on the size of your site.
I had tried Liquid Web for awhile before I tried Turbo Speed and was paying $129/mo. I switched because Turbo Speed was less expensive and in my opinion the service is better (my husband owns it).
If $15 a month for hosting is more of a commitment than you want to make at this point, you may want to consider starting out with the “beginner” option, Bluehost.
Site speed with Bluehost is good. When you start to get more than 3,000 or so visitors per day, you may start to notice your site slowing down with the Bluehost plan, and you’ll probably want to start looking into faster hosting at that point. Bluehost offers hosting for an incredibly reasonable $3.49 per month through my discounted link when you sign up for 36 months. (You pre-pay for all 36 months up front, but if you decide to cancel at any time, they offer a money-back guarantee. So if you had Bluehost for 6 months and decided to switch, they would refund the remaining 30 months.) You really can’t beat the value for your money and the excellent service with Bluehost.
If the difference between $3.49/month and $15/month is a big deal, definitely go with Bluehost. In fact, for the large majority of new bloggers, Bluehost is the perfect place to start, so we’re going to use them in our hosting setup example.
Setting up Hosting at Bluehost.
I am going to walk you through the steps of getting started with Bluehost. I’m going to take you through each step so you won’t have any problem.
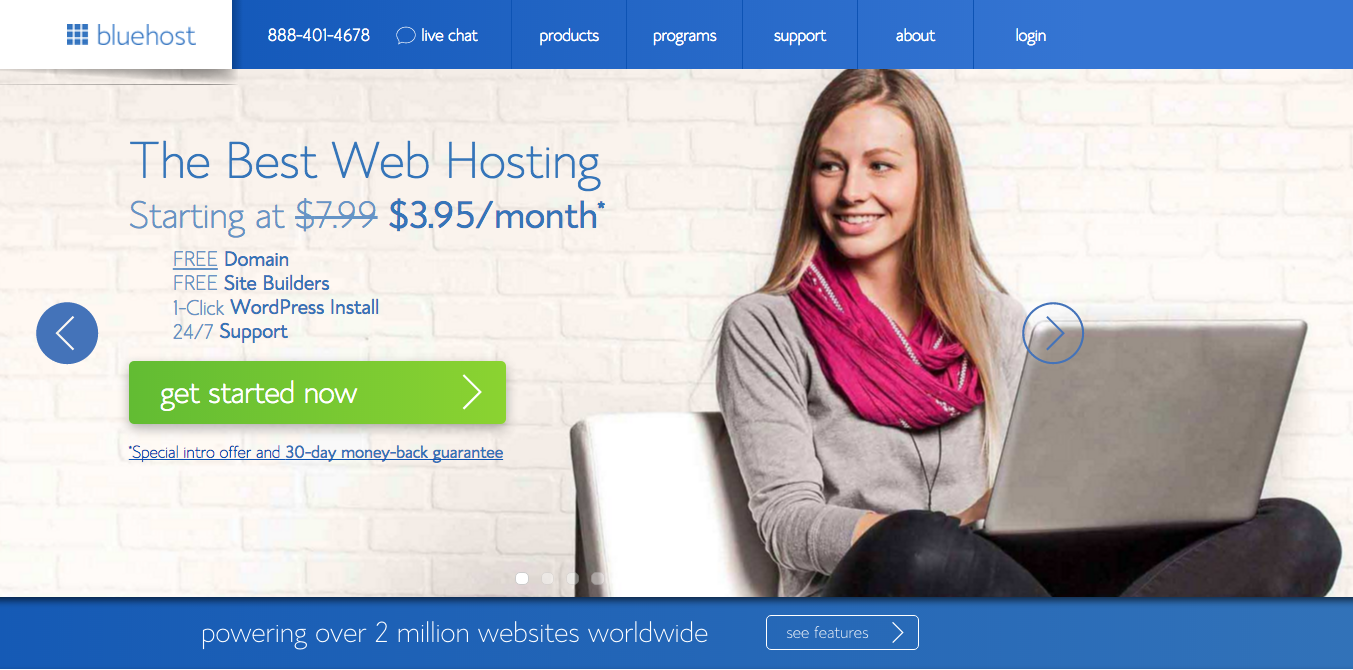
1) Head on over here. You’ll be re-directed to Bluehost through my affiliate link and you may get a few additional perks for signing up through my code. (Thank you for your support!) Click the big green “Get Started Now” button.
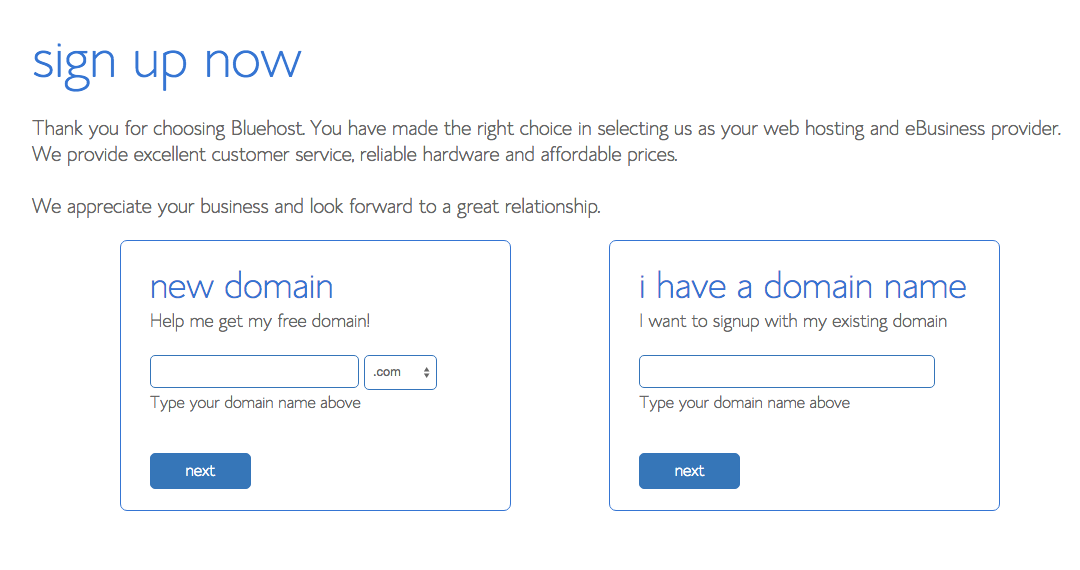
2) You should have already picked a domain name at this point. To register your domain name with Bluehost, enter it under the “new domain” box and click “next.”
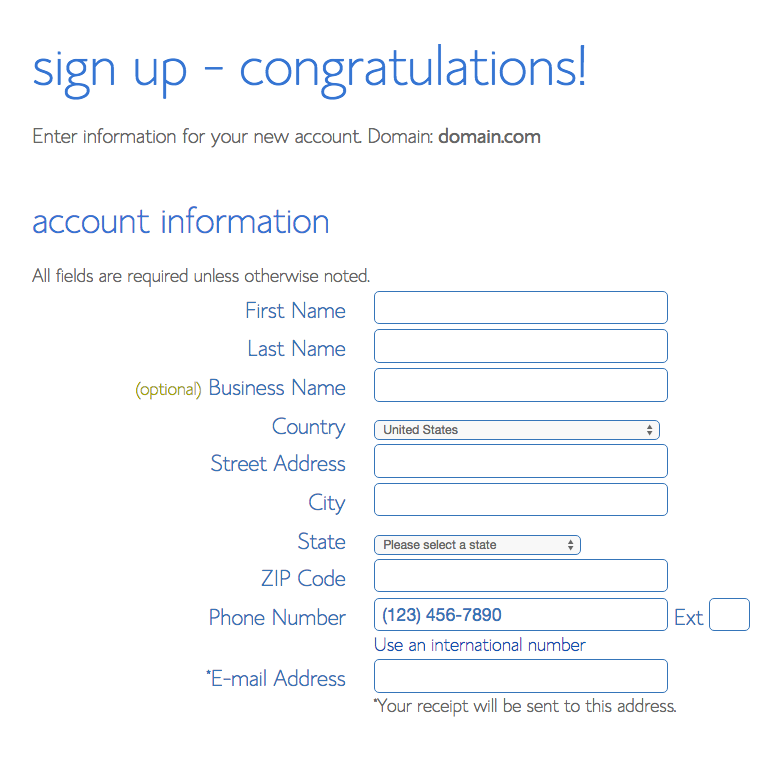
3) Enter all of your account and contact information.
4) Continue down to the “package information” section. Your cheapest option is to select 36 months. Bluehost will charge you for the full the 36 months upfront. You are prepaying for the hosting. That’s one of the reasons they are able to offer great hosting at such a small price. They always have that money-back guarantee, though, so you won’t risk losing your money. If the upfront cost is too much, you could always consider pre-paying 12 months. If that’s still too much and you’re just not sure, go with Turbo Speed Hosting. It’s $15/month, but you don’t have to pay for more than a month at a time.
There are other services available on this screen but you don’t need to worry about those yet. You can always add them later. (I’d recommend a backup system for your blog somewhere other than with your host so that you don’t lose all of your hard work if your site would crash or your host would have a problem.)
5) Enter your billing information, agree to the service agreements, and then click “next.”
6) You’ll have some more additional options you can purchase here, but I don’t think you need to at this point. They could be added later if you need them. Click “complete.”
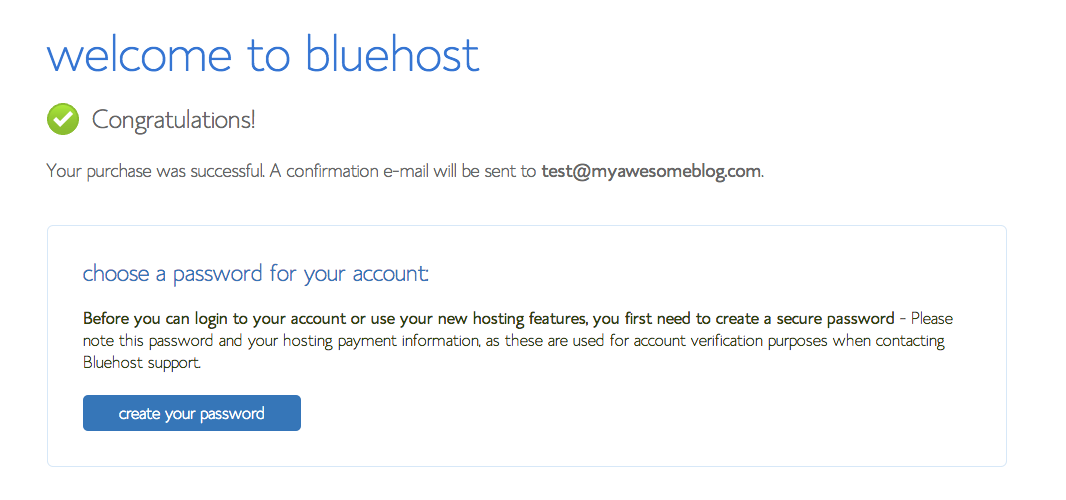
7) Woohoo! You officially have your own Bluehost account. Next you need to create your password.
8) On this screen, you’ll create your Bluehost account password. You want a strong password that you won’t forget.A

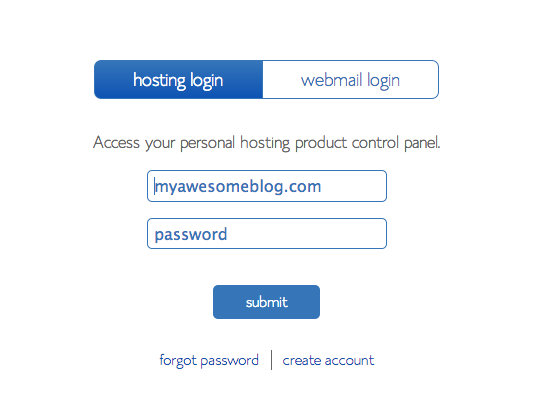
9) Now that your password has been created, you can log into your account. You will be logging into “hosting” and not “webmail.”
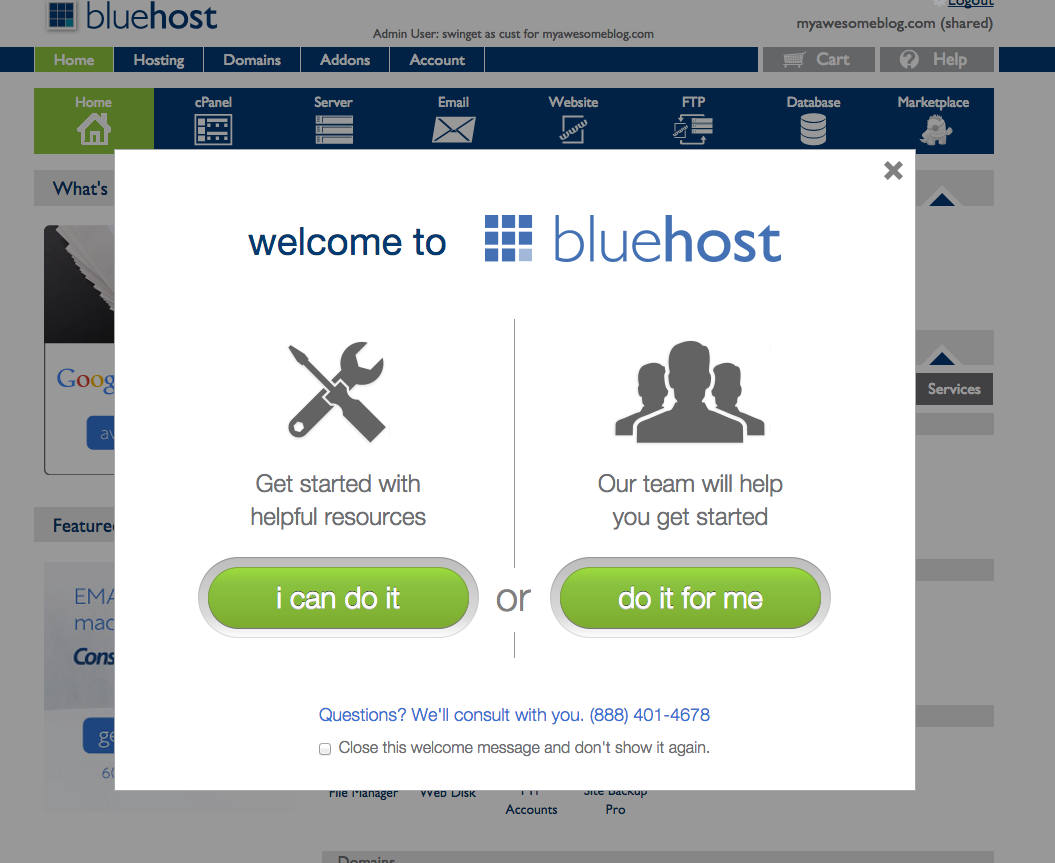
10) When your account opens for the first time, you’ll see a helpful little welcome message. You can close out of it since I’m walking you through it.
11) After you close that window, you’ll be in your account dashboard. You will get very familiar with this page. First you need to install WordPress. Click the “install WordPress” button at the bottom of the screen.
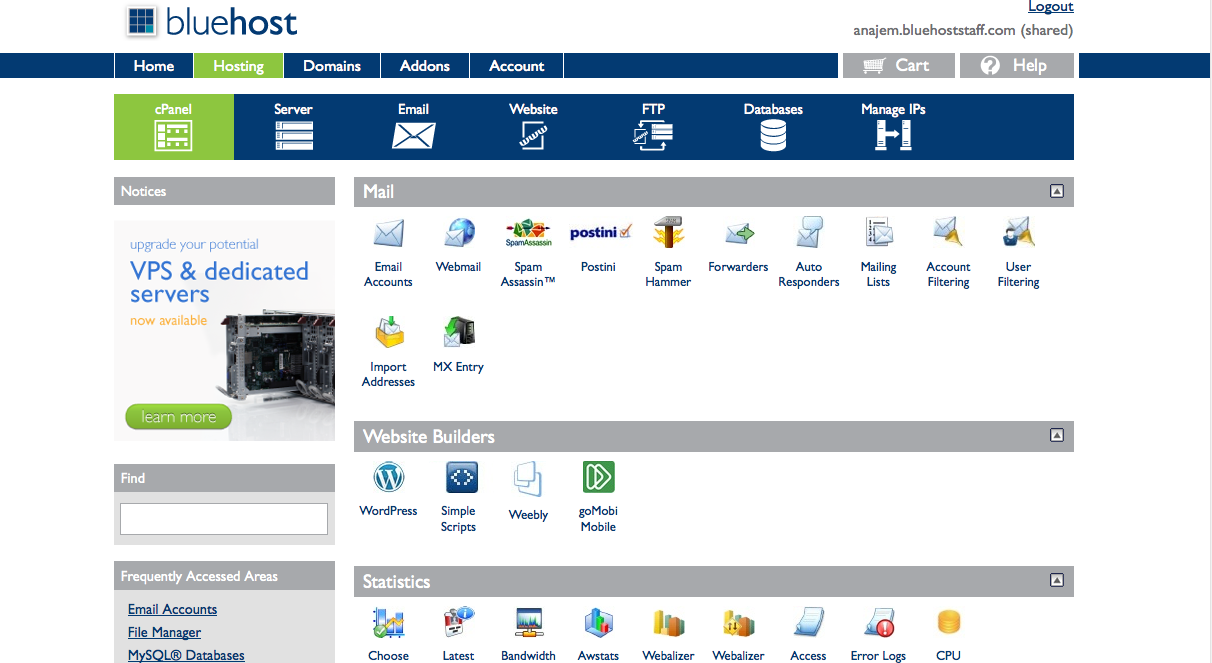
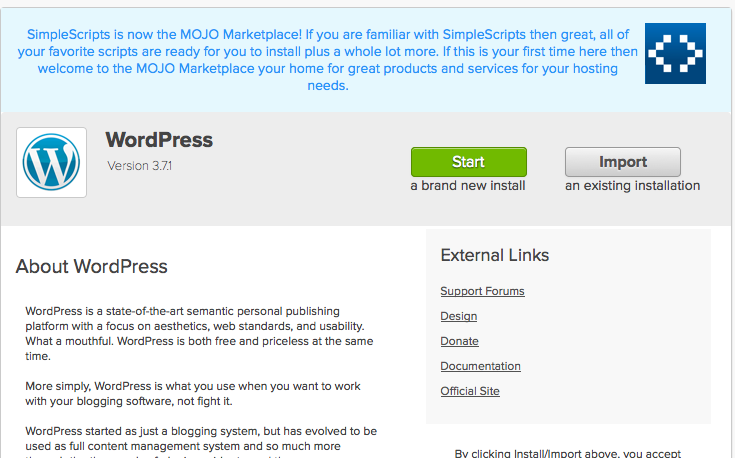
12) On the WordPress Installation screen, click “Start.”
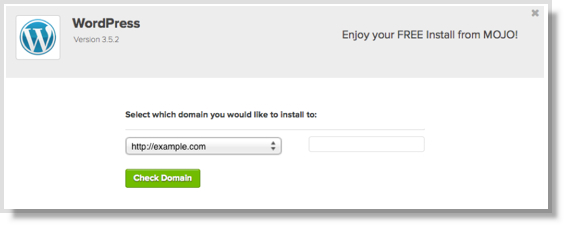
13) Select your domain to install it.

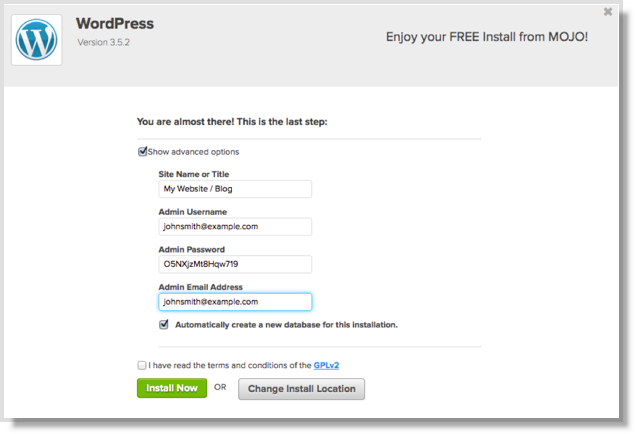
14) Name your site (you can always change it later), create a username for the WordPress install, and create a WordPress login password. You’ll want to make sure that “Automatically create a new database for this installation” and “I have read the terms and conditions of the GPLv2” are checked as well. Click “Install Now.”
15) Watch the little bar at the top of the next screen turn green. That means WordPress has been successfully installed.
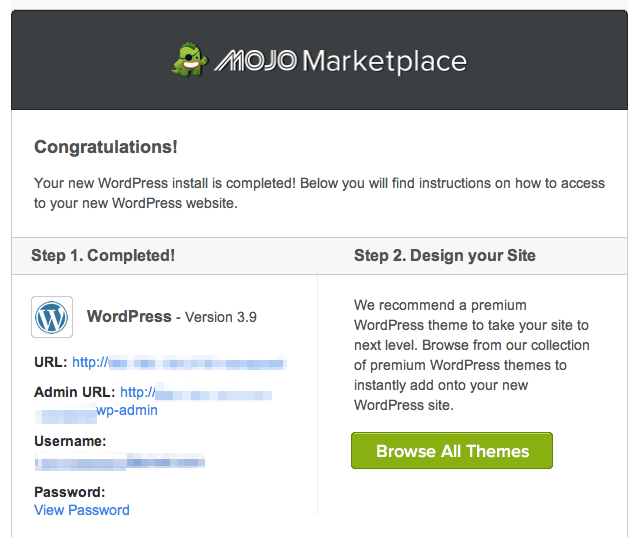
16) Now check your email, and you should have something from Mojo Marketplace. This email is important, so make sure you save it! It includes your website URL, your WordPress admin login URL, and your WordPress login username.
17) From the email in the previous step, click the Admin URL. It will take you to a site that looks like the one below. Enter your username.
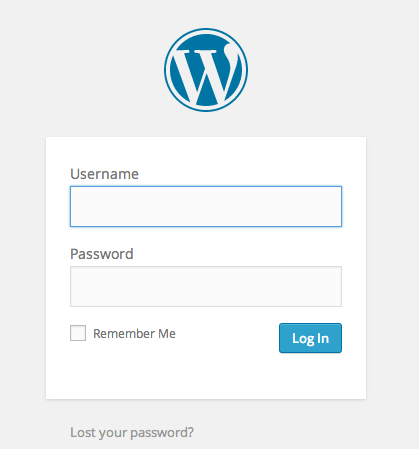
18) To retrieve your password, navigate back to your Bluehost tab and click the very bottom “view” to see your WordPress password. Remember, this alert expires after 12 hours, so make sure you get the password within that time period.
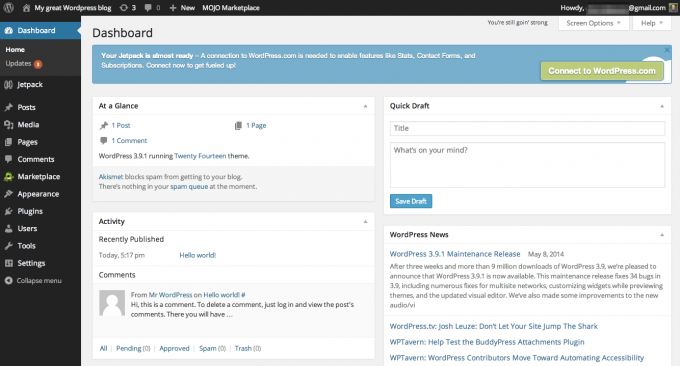
19) Now that you have your password, you can log into WordPress and you’ll be presented with your WordPress dashboard. You will learn to love this. Spend some time going through the various settings. It may be confusing at first, but in no time it will all be second nature.
Make it your own!
Yay!! You did it! Now comes the fun part. You get to design your blog. You can choose your colors, fonts, social media buttons and more.
I use the the Genesis Framework, which has lots of fun add ons to personalize my site. I use Restored 316 Designs. I love her work because it’s pretty and feminine. Not only are all of their designs gorgeous, but Lauren, the designer, is super sweet and helpful.
So that’s it! It’s just that easy to start a blog. So what are you waiting for? Go. Blog!





Thank you so much I’ve been researching starting a blog & having another view & opinion on things like Hosting is awesome. Plus you answered some questions I haven’t been able to find on other sites.
I have always thought about starting my own blog, but my main concern is the ‘time’ I would need to devote to it…but I’ll bookmark this anyway, you have covered all the bases!
I have friends that blog as a hobby so you can really put as little or as much time as you’d like towards it which is the nice thing about blogging 🙂
Great tips!!! I agree with Laura, I wish I had this post when I started!!
I wish I’d had your post when I started blogging. I had no idea what I was doing and no idea where to look. I mostly lucked into everything. I started with WordPress.com and fortunately, it pretty much walked me through the process. I’m still with them today although I ran out of space with the free option and moved to Premium for $100/year. Probably the most helpful thing was hanging with you guys in the North Iowa Bloggers when it started as a small intimate group. I got a lot of questions answered that way. My blog is still just a hobby to record my travels but I enjoy it. Thanks, Donna, for an informative and enlightening post.
Thanks, Laura! I love reading about your travels and I love that you are a North Iowa Blogger!